I spent this weekend at First Landing State Park in Virginia Beach. It was a wonderful time spent with 75 other women from VA, MD, OH, DE and probably several other states. I camped in the back of the van. I attended lots of neat classes. I took an early morning walk on the beach and collected shells for the girls. I ate some REALLY good food. I taught a class on "Reducing Your Foodprint". If you're here because of the Women's Wellness Weekend, welcome! If you scroll down the right side of the blog, you will see a special label I created for WWW. Click on that, and many posts will pop up that I hope you will find helpful.
Friday evening, we had a Seafood Buffet and a crab-eating demonstration.
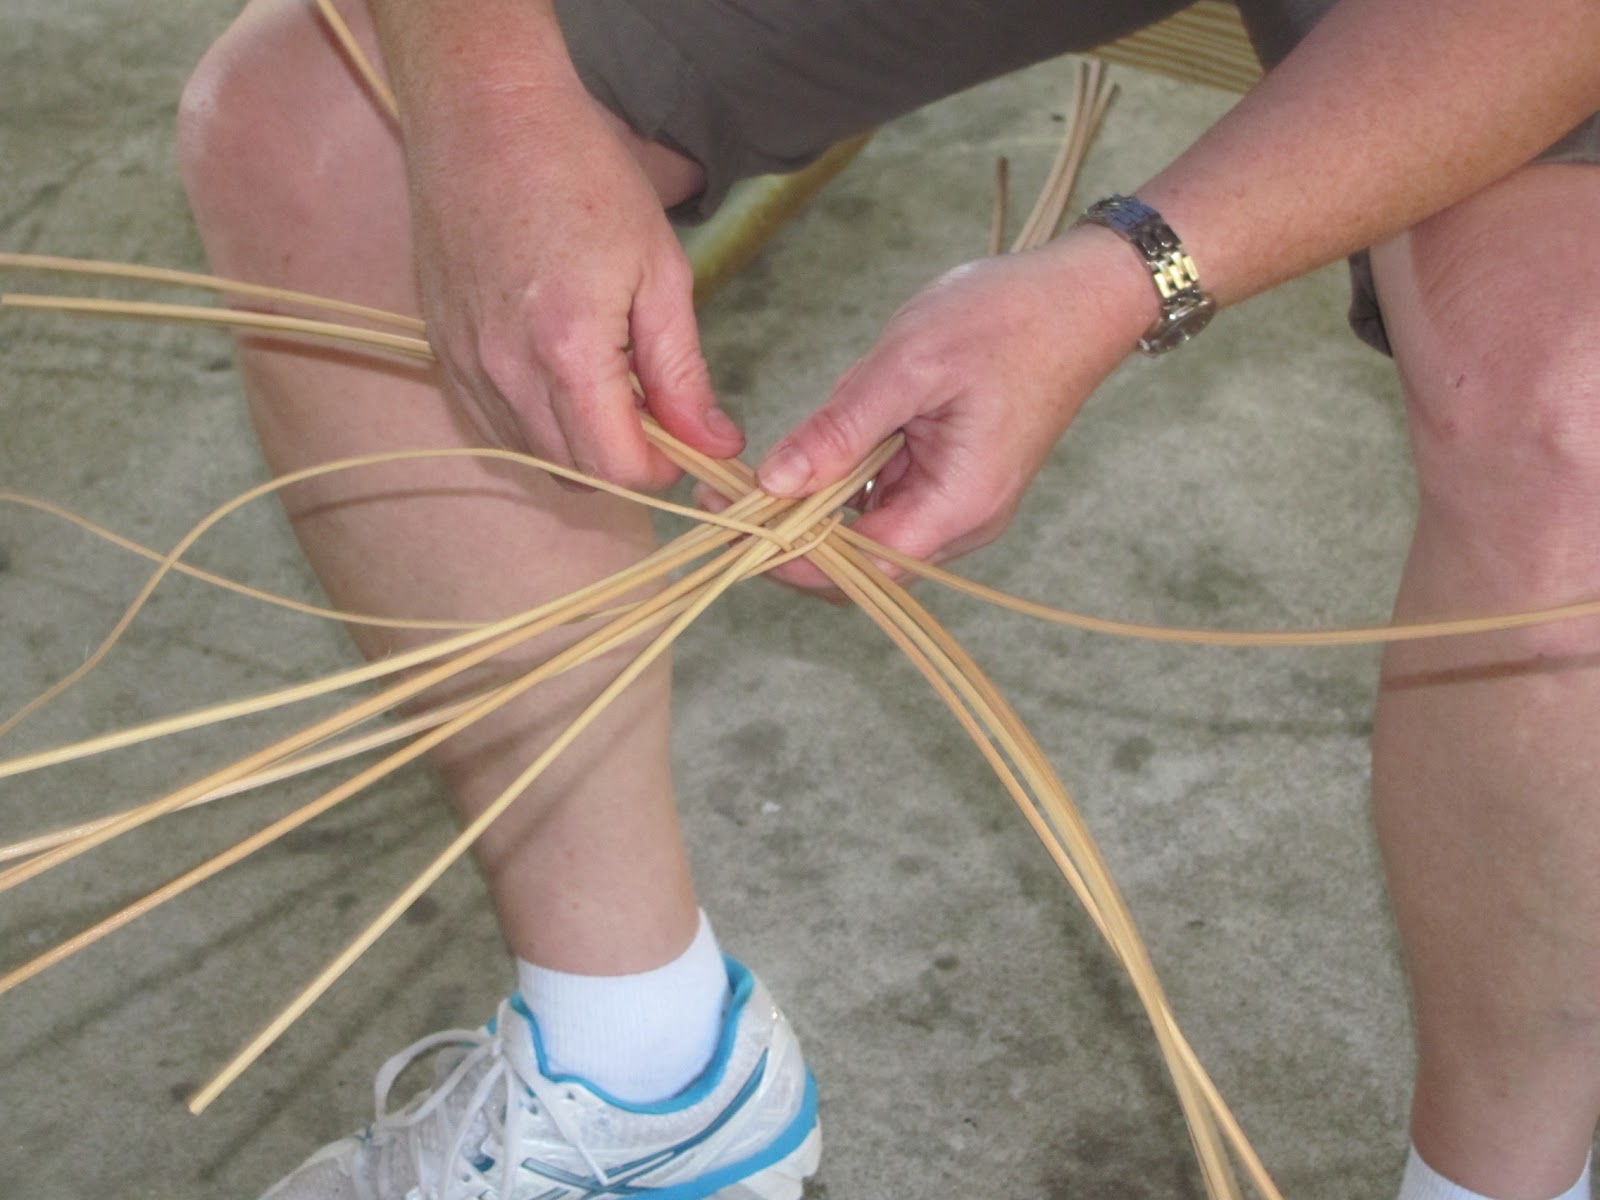
Saturday morning I had a basketmaking class. We started with a pile of grapevine, honeysuckle, and Virginia Creeper.
After a brief demonstration on how to proceed, we each wove our own basket.
This is the bottom of mine, which we started using commercial round reed.
In under two hours, I was finished! Here's my basket. I kind of love it.
In the afternoon, I went to a Colonial Medicine class which kind of reinforced the herb knowledge I've been slowly acquiring. One of the instructors was a reinactor, and the Jamestown history he shared was quite interesting. Being from Massachusetts, I got a thorough Plymouth education. The Jamestown and Lost Colony parts weren't exactly stressed.
Then, I taught the "Reducing Your Foodprint" class... buying local and unprocessed and how to replace convenience items with homemade. I had fun. I hope the students did, too. We talked about this HOMEMADE OATMEAL MIX. It's sweet, so cut the sugar. I also mentioned THESE CONTAINERS which are great for making homemade gogurts out of leftover smoothies. I am pretty sure I paid more for them, so get them while the price is low! We made homemade Sticky Chicky and Taco mixes. We chatted. It was fun.
I miss teaching. I forget how much until I get the chance to do it again.
We had a great BBQ dinner on Saturday night. Here's the four of us from the Virginia Urban Homesteaders League. Cat taught "Greening your Home", Micki taught Knitting, and Jen taught "Canning and Preserving".
I headed back to the campsite afterwards. There were storms and heavy rain predicted, so I crawled into the van and curled up with a book and a flashlight. It was quiet and heavenly. The rain started over night, and I loved waking up to the pitter-patter of it on the van roof. There were no bickery children.
Today's class was Knitting, which I am happy to say I finally got the hang of. It took me awhile (I am a hopeless crochet-er) but Micki was patient and I am now on my way to making a cotton dishcloth. Which is all I ever really wanted to knit, so it was a perfect project for me!
After a lovely brunch (perhaps the best quiche I've eaten!) it was time to head home. Some women had hours of traveling. I had 35 minutes. I stopped off at the Commissary and they had HUGE Naval Oranges for .25 each. I bought 16 of them. They also had 3-lbs bags of smaller ones for a buck, so I bought 3 bags. Now I just need to figure out what to do with them. I'd make marmalade, but I don't want to use the skins because they aren't organic. Stay tuned.
Rosey the Riveter
Showing posts with label Womens Wellness Weekend. Show all posts
Sunday, April 22, 2012
Saturday, March 10, 2012
Strawberry Shortcake
Normally, I buy organic strawberries. And in about 5 weeks, I'll be able to actually go to a farm and pick them myself. But lately I've been in a fruit funk... I try to buy seasonal and I'm so tired of apples and pears and oranges. Part of the problem is that last summer, in the middle of a move, I couldn't 'put up' anything. No peaches or blueberries or plums or raspberries or any other flavor of summer.
So today when I saw strawberries on sale buy one get one, I stopped. And I looked. They were Florida strawberries, not California like they usually are. (I absolutely will NOT buy them from CA since they passed that law allowing the use of a really nasty chemical for strawberries.) They actually looked good. I thought about the heavy cream I had in the fridge, and the Baking Mix I had in the cupboard, and I knew we had to have Strawberry Shortcakes for dessert tonight.
I followed the same biscuit recipe... 2 1/4 c Baking Mix and 3/4 c buttermilk, but I also added 1/4 c sugar to make the biscuits a little sweeter to go with the strawberries. Bake at 425 for 13-15 minutes, and serve with macerated strawberries and fresh whipped cream. Mmmmmm!!! May be it was the fact we haven't had berries in months and months... but both hubby and I couldn't get over how tasty these were!
Friday, March 9, 2012
Grandpa Lepper's Quiche
This is such an easy quiche to make, and you can personalize it with whatever mix-ins you want.
3 eggs
1 1/2 c milk
1/2 c Baking Mix
1/2 c butter, melted (I've used as little as 1/4c and it's fine)
salt and pepper to taste
Whatever toppings you prefer
Blend all ingredients in blender or food processor until frothy. Pour into ungreased pie plate. Add toppings such as cooked bacon, ham, cheese, onions, etc etc. Bake 45 minutes at 450.
Here, I used ham, cheese, and fresh garden chives.
Thursday, March 8, 2012
Homemade Garlic Cheddar Biscuits
If you are a fan of the biscuits served at Red Lobster, these are for you!
2 1/4 cups of Baking Mix (see yesterday's post)
3/4 c buttermilk
shredded cheese
garlic powder
butter
Preheat oven to 425. Mix together the baking mix and buttermilk. Add cheese to taste (a handful or so) and some garlic powder, too. Roll into a log and slice into 8 pieces. Bake for 13-15 minutes or until light brown. Brush with butter and sprinkle with more garlic powder if you want.
For run-of-the-mill but still delicious plain biscuits, just leave out the cheese and garlic. No reason to buy the biscuits in the cardboard cylinders anymore! They are really yummy with butter or homemade jam or with ham and eggs!
Wednesday, March 7, 2012
Homemade Baking Mix
I used to use a lot of Bisquick. Until I realized that it contained trans fats. And was ridiculously easy to make, not to mention much cheaper. I make a big batch of it about every other month or so. It mixes up in no time at all. If you are just beginning to phase out packaged products, this is a great place to start.
Homemade Baking Mix
6 cups flour
3 Tbl baking powder
3 Tbl sugar
1 Tbl salt
1 c shortening, butter, or shortening substitute, cut in small pieces
Place the first 4 ingredients in a food processor and pulse to mix. Add in the shortening and pulse until it looks like cornmeal. Store in an air-tight container... if you use shortening or shelf-stable substitute, in the cupboard is fine. If you use butter or a substitute that requires refrigeration, keep in in the fridge.
Stay tuned for some great recipes using this Baking Mix!
Tuesday, March 6, 2012
Homemade Wheat Thins
I've made wheat crackers before and we've all loved the texture and taste. However, they were very hard to roll thin enough to get really crispy, and I gave up.
Until this morning, when Abby announced she wanted me to make some for her to take to school for snack and lunch. This time, I went to King Arthur and I was not disappointed. I could not believe how easy it was to roll this dough thin.
I have had the KA 'Whole Grain Baking' cookbook for awhile. I don't use it nearly enough. Now, KA has a TON of great recipes on their website. But unfortunately, these crackers aren't there. However, some lovely bloggers have already taken the time to type it up, so I'm not going to. You can find the recipe HERE or HERE.
I strongly recommend making this in a food processor. It will save you time cutting in the butter and the dough will come together a lot faster. I used white whole wheat flour, simply because I'm trying to use up our supply so I can start grinding my own.
After rolling, I used a dough scraper to cut (and transfer to the baking sheet) but a pizza cutter would work, too.
Please don't forget to sprinkle with salt, and watch them carefully so you don't burn them.
Here's the final product, in all their wheat-crispy-salty goodness:
Way cheaper than buying them, no packaging, and no preservatives. Win-win.
Sunday, February 19, 2012
Where's the Beef?
After a long search, I finally located a local farm offering grass-fed beef. As in ALL grass fed, not finished on grain. I reserved a 1/4 of a side, and the price was $4.25/lb, which is way cheaper than just buying grass-fed ground beef, ON SALE, at the grocery store. The best part was that once a month, Windhaven also delivers beef and pork to the Chesapeake area... so I didn't even have to drive out to the farm (about an hour away) to get it!
It came nicely vacuum packed and labeled in these two boxes:
We got 26 1-lb packages of ground beef, 3 packs of stew meant, 3 chuck roasts, 6 Delmonic steaks, 6 NY strips, 5 Filets, 3 chuckeye, 2 flat iron, 1 brisket, 1 flank, 1 hanging tender, 1 eye round, 2 top round, 1 bottom round, 2 sirloin tip roasts, 2 sirloin strip, 3 packages of short ribs, 2 4lb packages of soup bones, plus the heart, liver and oxtail which I have NO CLUE how to use! In total, it was about 150 pounds of beef.
It took up one whole shelf in the kitchen freezer, plus most of the small upright out in the garage (I had to plug it in and get it up and running, since I hadn't needed it since we moved in.) Just about the time we start making a dent in the beef, our 1/2 pig should be ready sometime in June, so I seriously doubt I'll be able to unplug that freezer anytime soon. We'll see how it affects the electric bill, but at this point I don't even care... it's SO nice knowing that we have a freezer full of quality meat.
I also got some pork from Windhaven. I cooked up the picnic shoulder yesterday and it is absolutely delicious. There's also some bacon and sausage which I can't wait to try. Now, if only I could find a good source of chickens, I'd be all set!
Saturday, January 28, 2012
Revamping the Spice Cupboard
Have I mentioned how much I love my garden? I have the previous owner of the house to thank... he made all the raised beds and planted a bunch of perennial herbs in one of them. Sage, Rosemary, Chives, Garlic Chives, Thyme, Oregano, Basil, Dill, and Lavender were all thriving when we moved in. I quickly added parsley and cilantro, and they have over-wintered very well. However, I'm not sure how much longer they are going to last. So, I've been harvesting the parsley every so often and dehydrating it, just to make sure I always have a good supply. It puts the store-bought stuff to shame, and tastes exactly like fresh once it is rehydrated in whatever I happen to be cooking.
The first step is to wash it and give it a ride in the salad spinner.
Next, use kitchen scissors to snip off the leaves. You want as little of the stem as possible. I do it right over the dehydrator tray.
All of the parsley picture above looked like this once I finished de-stemming:
Dry at 95 degrees for about 8 hours, or until it's crunchy. It shrinks up pretty well.
Can you see how pretty it is and how much greener it looks than the store-bought stuff?
I store it in a canning jar and crumble it when I use it. Keeping the leaves whole while in storage makes it taste better and last longer.
If you're harvesting in warmer weather, be careful not to get any Black Swallowtail Caterpillars. (It's worth it to plant parsley just to watch the caterpillars grow. If you plant it, they will come!)
Thursday, January 26, 2012
Who Needs Thomas'?
I was in Food Lion today to pick up a container of cottage cheese that I needed for lasagna. In my dash to the dairy case, I happened to notice they carried Barbara's Peanut Butter Puffins. My favorite cereal ever! Then I noticed the price. $5.69. FIVE DOLLARS AND SIXTY-NINE CENTS! Are you kidding me?
I quickly remembered why I gave up buying cereal. First, I'm too cheap. Second, unless it's organic, chances are that genetically modified corn is an ingredient. Even in Kashi, which was a surprise even though it probably shouldn't have been. Third, I know I can do better.
Tonight I made a huge batch of English Muffins (I've been making them for awhile but this is the first time I've had corn meal. Now they really look like the real thing.) Last week I made a batch of masa-waffles and froze them. Every morning, we toasted them straight out of the freezer and the girls ate with Papa's maple syrup. Sometimes it's homemade yogurt sweetened with homemade jelly with homemade granola. Or the homemade instant oatmeal mix with dehydrated fruit. On the weekends it's omelets with free-range eggs from the farmer down the road and peppers I froze from the garden. Occasionally, I'll make a batch of blueberry pancakes. Or french-toast to use up the 'bread ends' that end up in the freezer... homemade wheat bread toasted with homemade jelly... the list goes on.
The point is... we don't miss the cereal. And most of our breakfasts are just as quick in the morning.
Take that, Monsanto!
Wednesday, January 25, 2012
Homemade Vanilla Extract
One of the gifts I used this year for teachers and hostesses, etc. was homemade Vanilla Extract. It was super easy, and recipients have expressed A LOT of interest in how it's done. Last week, there was an article in the paper about making your own, which prompted even more questions.
So, I decided to post about it (I know, I know... just like every other blogger out there. It's a popular topic.)
First of all, get yourself a 1.75 L bottle of Vodka and a half pound of vanilla beans. (Do not buy these from a local store, you'll pay through the nose. Order online. I have used www.olivenation.com and have been happy. Best of all, they frequently have coupon codes and they always have free shipping on vanilla beans.)
I pour the Vodka into wide-mouth canning jars. You want to use at least 8 vanilla beans per cup of vodka.
Slice each bean the long way, and insert into the vodka.
Let sit for about 3 months and shake it when you think of it.
You'll see it getting darker and darker.
When it's done, you won't smell the Vodka.
For gift-giving, I purchased 4 oz amber bottles from HERE. I think I got 4 dozen and they were about a buck each after shipping.
I downloaded THIS free image and doctored it up using WORD.
The perfect, useful little gift.
Tuesday, January 24, 2012
Homemade Nutella
My kids love Nutella. Unfortunately, the first ingredient is sugar. And it contains palm oil, which is something I'd rather stay away from. So I set out on a quest to find the perfect recipe so I could make it myself.
The first challenge was finding the hazelnuts (also called filberts). Because it was during the holidays, some stores had them. And they were expensive, even if they weren't already shelled.
My lovely sister-in-law ordered me some from her co-op. (One of the things I REALLY miss about living here... there aren't any!) This is what 25 lbs of hazelnuts look like:
So, $160+ later, I had the nuts. And lots of them.
I scoured the interned for recipes. They were very similar, but we tried about half a dozen of them. They all called for cocoa, which I determined was the problem. Real Nutella is definitely milk-chocolaty, and those recipes were good, but more for an adult palette, not an 8 year old's.
I had a lot of homemade nutella at this point. To use it up, I made several batches of "Nutella Crinkles" that everyone loved. (I left out the chopped nuts because we don't like crunchy cookies.)
The quest for the perfect Nutella recipe was interrupted when my food processor died. I debated whether to spend mucho bucks on a Kitchen Aid or a Cuisinart, but settled on a $40 Hamilton Beach that got good reviews (and I can replace three or four times for the cost of the others.) It's larger and more powerful than my other, so I'm happy with the decision.
When I decided to resume the recipe search, I decided to pull out all the stops. The best recipe we'd tried so far used a can of sweetened condensed milk instead of sugar, and it made the smoothest spread. But it used cocoa, so it wasn't quite like the real thing.
I decided to make up my own recipe, using milk chocolate chips instead of the cocoa. It was the unanimous winner, and our search for a Nutella recipe is over. Here it is:
Toast 7 ounces of hazelnuts (which does NOT make a dent in the 25lbs!)
Remove as much of the skins as possible. You won't get them all, but do what you can.
Run them through a food processor for about 5 minutes, until they get liquidy (like the consistency of peanut butter.)
In a double-broiler, melt a package of milk chocolate chips. Stir in a container of sweetened condensed milk.
Add in the hazelnut spread and mix well.
Put it through another spin in the food processor if you want to really smooth things out. Drizzle in some canola oil if it needs it.
Voila! Kid-approved Nutella.
Now, I will not pretend to be happy that this recipe contains not only a whole package of chips, but also a whole can of sweetened condensed milk. But it's not as sweet as the original, so I know it has to have less sugar (which is, after all, the very FIRST ingredient in Nutella).
Friday, December 30, 2011
100% Cranberry Juice
Have you looked for Cranberry juice lately? I mean REAL, 100% Cranberry Juice? I have. And it doesn't seem to exist. Even the stuff labeled as cranberry juice has 'Grape juice' listed as the number one ingredient. What's a girl with UTI issues to do?
The answer, of course, is make her own!
I picked up a couple bags of cranberries at the grocery store and rinsed them. Then, I placed then in a large sauce pan and covered them with water. Heat over medium-low until most of the cranberries are split (but don't boil), and drain the juice out into another saucepan. Set aside. Mash the cranberries and cover them with water again. Heat over medium-low for about 5 minutes. Drain juice into other saucepan.
At this point, I put the mashed cranberries into the dehydrator. The plan is to use them in muffins and cookies. Next time, I might try using them to make cranberry sauce.
Back to the juice. Add about 1/2 cup sugar per quart, and bring to a boil. Adjust sweetener if needed. Let cool, then store in the fridge. It's a great color, and I was pleasantly surprised at the taste.
Price-wise, I would never buy the cranberries solely for making juice. However, because the juice is a by-product, and the cranberries can be used for other things, I think this is something we'll be making on a regular basis. Plus, it's really pretty!
Wednesday, December 28, 2011
Homemade Orange Extract
After making Homemade Vanilla Extract, I decided I wanted to try making some other flavors. Orange seemed easy, so I decided to give it a shot.
Normally, I don't buy organic oranges (their thick skins protect the fruit from pesticides) but when I know I need to zest them, I do. So, splurge on an organic orange and zest the skin. You don't want any of the white stuff, as it's bitter.
Then, it's as easy as adding vodka. Put it in a dark place, shake it occasionally, and in a few weeks you'll have some great orange extract.
I used mine to make some citrus icing to go over some cranberry-white chocolate cookies and I was really blown away. The flavor is much better than store-bought stuff, and I know exactly what is in it. I'll never buy orange extract again (and as soon as I can find organic lemons, you know what I'll be making next!)
Monday, December 26, 2011
Apple Cider Vinegar Update
As I mention, Mom and Dad are here visiting. I had mom taste the apple cider vinegar (I don't know what it's supposed to taste like!) and she pronounced it fine. It's definitely more mild than store-bought (I could tell that just by smelling... as in, it's not overpowerful.)
I wouldn't use this for anything where acidity is important (canning), but for cooking and household uses, I now have 3 quarts of homemade Apple Cider Vinegar which should last us awhile. Mom said she used her home-brewed stuff to make pickled eggs, and Dad said he couldn't tell the difference.
Obviously, since it's really cheap to buy, this isn't a project that's going to save a ton of money. However, I love knowing that I made something REALLY useful out of apple scraps that normally would have been dumped in the compost.
Wednesday, December 14, 2011
Book Review: "Make the Bread, Buy the Butter" by Jennifer Reese
I absolutely loved reading this book. The author has a great style with just enough snark/sarcasm to be very entertaining. It was very reassuring to me that it's *okay* not to do it all... impossible (and unwise) to make absolutely everything from scratch in the kitchen!
But this is more than a book... it's also a cookbook which has already proven to be a great resource. (I bought it sight unseen because our library didn't have it, and I'm glad I did.) The English Muffin recipe is amazing... I'd been promising my oldest that I'd make them and finally got around to it. The verdict? On a scale of 1-5, she gave Thomas' a 4.5 and these a solid 5! They remind me of the Portuguese Sweet Muffins I used to buy at The Christmas Tree Shop, only not sweet (although they could be with some added sugar, I'm sure!) Next time, I'll be sure to roll them thinner (I had to finish them off in the oven because the outside was burning before the inside was cooked.) but these will definitely be added to the breakfast rotation.
Last night I made the granola and everyone went gaga over it. I am especially excited about that because now I have a good replacement for store-bought cereal, which I haven't bought in awhile. Now that the chickens have slowed laying, it's been difficult to find local eggs which had been a breakfast staple... and I don't really relish having to make the English Muffins every week (they are somewhat time/labor intensive.)
I didn't have great luck with her every-day bread recipe, but that might have been because I didn't let the whey come to room temperature before using it. I think it was too cold and killed the yeast... it tasted great but didn't rise at all.
The author has a blog at The Tipsy Baker which I highly recommend, as well. Currently, she is cooking her way through many of the cookbooks in her collection. Be sure to check out the book and the blog.
Saturday, November 19, 2011
Apple Cider Vinegar
A few days ago I happened to see this post from hipgirls, and I pinned it so that once I found a good price on organic apples, I could use my applesauce scraps to try making vinegar. Lo and Behold, $1.49/lb later, I was toting home some Galas and Braeburns and Golden Delicious.
So, I peeled and cored them and threw them in the crock pot for applesauce, and then the real fun began. Personally, I would only use organic apples for this, since the peels are involved.
I saved all the scraps (I used 10 apples) in my Pfaltzgraff batter bowl. Don't use a reactive container.
I needed 2 quarts of water mixed with 1/2 c sugar to completely cover the apples.
Cover with cheese cloth to keep out the fruit flies. (Borrow bungee cord from hubby's tool box. He won't mind.)
Let it sit at room temperature for a week. Strain, then continue to ferment for 2 or 3 more weeks (covered, of course) stirring occasionally. I'll post another update to let you know how it turned out, and how much the family complained because it stunk up the house...
Saturday, October 29, 2011
Preserving Broccoli
One of the first things I planted once we moved in was broccoli. Fall planting is new to me, so I was excited to try it out, and having never grown broccoli before, the whole process was exciting.
I didn't really know when it was ready to pick, so I probably waited a few days too long, but the first thing I did was to soak it in salt water. This is (SUPPOSEDLY) supposed to kill any of the cabbage worms that love any plants in the cole family.
Then, I chopped it up into bite-size pieces.
Place into boiling water and blanch for three minutes.
Immediately remove from heat and put it in an ice-water bath to stop the cooking process.
Drain (and dry) thoroughly. After the colander, I set mine on the counter on a clean dish cloth to dry more. The less liquid that is on it, the better it will freeze. It is interesting to note that it was while dumping the broccoli into the colander that I found not one, but TWO little worms. I did not tell the family, as that would have grossed them out. Lesson learned: don't rely on soaking!
Store in freezer-proof containers. I used Ziploc freezer bags but next time I may try the vacuum sealer just to compare.
I only planted 8 heads. In the spring, I think I'll bump it up to at least a dozen. Once you harvest the main head, small shoots will start growing which will provide even more. But there's no way 8 plants will be enough to last us through the winter, which is my ultimate goal ('winter' here being a relative term. I'll be harvesting the broccoli probably until Thanksgiving, and the spring crop will be ready in April, so really I need only a 4-5 month supply from both the spring and fall harvests). Still, ideally that means about 16 plants, and I'm not sure I have the room for them.
These plants were the Packman variety, purchased as plants at a big-box store. Next time, I think I'm going to try growing organic Thompson from seed. It's slower growing (70 days vs. 55) but it has a long harvest period so I think it'll all come out in the wash.
Monday, October 24, 2011
Canned Chicken
I got a great deal on Amish-raised chicken breasts through Quail Cove Farms, and on Thursday it was all delivered right to my door (along with 40lbs of sweet potatoes. Seriously, what was I thinking?) I could only fit 6 of the 12 packages in my freezer, which meant either plugging in the upright that is out in the garage and raising the electric bill even higher, OR pressure canning it for shelf-stable storage. Needless to say, the canning won out.
On Sunday, I cooked up the chicken and added carrots, celery, and onion to make some broth at the same time. After it all cooled, I de-boned the meat and skimmed the fat off the broth.
This morning, I packed the meat into freshly washed pint jars while boiling the broth.
I added a teaspoon of salt to each jar. I think I could have gotten away with half a teaspoon, so we'll see what it tastes like.
Then I added the broth, leaving an inch and a quarter headspace.
I placed them in the pressure canner, then covered and waited for the steam.
Once the steam starts coming out at a steady pace, set the timer for 10 minutes. This takes all the air out of the pot.
Place the pressure gauge on, and watch the pressure climb.
Once it reached 11 pounds of pressure, I started the timer. Pints require 75 minutes... and most of those 75 minutes have to be spent in the kitchen, keeping an eye out and adjusting the stove to make sure the dial stays at 11 pounds. This was a good time to wash dishes, empty the dishwasher, clean off the counters, sweep and mop the floor, etc. etc.
When processing time is up, turn off the stove and remove the pot to cool. LIFT it, don't drag it off the stove.
Once the pressure is back to zero and the lock pops down, take the gauge off and let it cool for 10 more minutes. At this point, you can open the canner and admire your work.
Most of the jars sealed immediately. One of them didn't, so I thought we'd have to use it for dinner. But a couple hours later, I heard a ping and sure enough, it had sealed!
I learned a couple of good lessons. The first is that I should NOT have tried to squeeze a canning session in this morning. I started the process at about 7:30am... and I was still late to my 10:45 meeting. Next time, I'm picking a day when I have nowhere to be.
Also, the next time I get a good deal on chicken, I am hoping it will be on boneless, skinless breasts. That way, I can pack them raw and not have to spend the time making the broth and deboning them, and waiting for the broth to cool to skim fat. The processing time remains the same, so to me, it's a 'wasted step' to cook the chicken before. Except there was no other way to get it off the bone, so I had no choice.
Finally, I've decided that I need to get another rack for the pressure canner so I can 'double up' and do 14 pints instead of 7. It would be about 5 more minutes of work but result in twice the chicken, so that's a no-brainer. Luckily, Amazon sells the extra racks for like $10. Well worth it!
Subscribe to:
Posts (Atom)