Rosey the Riveter
Monday, January 30, 2012
Cleaning out the Pantry
I have had these large cans of whole tomatoes in the pantry for way too long (as in years, not months.) Since storage space is such a concern here (we left a 1,000 sf basement and now have none), I decided enough was enough. Time to dehydrate and make some more space in the pantry.
I pureed two cans in the blender and decided it was too thin... so I had to cook it down.
Before I pureed the rest of them, I drained out the liquid first. That made all the difference.
Then I spread a thin layer on the dehydrator sheet and let it go overnight.
In the morning, perfectly dehydrated tomato leather that peeled right off in one piece.
Next step, return to the food processor to grind it up. I crumbled the big sheets to make them fit.
All six tomato cans now fit in a single pint jar!
The tomato seasoning can be added to soups, chilis, meatloaf, etc. or reconstituted to make tomato paste or tomato sauce.
And I have more shelf space in the pantry. Win-win!
Saturday, January 28, 2012
Revamping the Spice Cupboard
Have I mentioned how much I love my garden? I have the previous owner of the house to thank... he made all the raised beds and planted a bunch of perennial herbs in one of them. Sage, Rosemary, Chives, Garlic Chives, Thyme, Oregano, Basil, Dill, and Lavender were all thriving when we moved in. I quickly added parsley and cilantro, and they have over-wintered very well. However, I'm not sure how much longer they are going to last. So, I've been harvesting the parsley every so often and dehydrating it, just to make sure I always have a good supply. It puts the store-bought stuff to shame, and tastes exactly like fresh once it is rehydrated in whatever I happen to be cooking.
The first step is to wash it and give it a ride in the salad spinner.
Next, use kitchen scissors to snip off the leaves. You want as little of the stem as possible. I do it right over the dehydrator tray.
All of the parsley picture above looked like this once I finished de-stemming:
Dry at 95 degrees for about 8 hours, or until it's crunchy. It shrinks up pretty well.
Can you see how pretty it is and how much greener it looks than the store-bought stuff?
I store it in a canning jar and crumble it when I use it. Keeping the leaves whole while in storage makes it taste better and last longer.
If you're harvesting in warmer weather, be careful not to get any Black Swallowtail Caterpillars. (It's worth it to plant parsley just to watch the caterpillars grow. If you plant it, they will come!)
The first step is to wash it and give it a ride in the salad spinner.
Next, use kitchen scissors to snip off the leaves. You want as little of the stem as possible. I do it right over the dehydrator tray.
All of the parsley picture above looked like this once I finished de-stemming:
Dry at 95 degrees for about 8 hours, or until it's crunchy. It shrinks up pretty well.
Can you see how pretty it is and how much greener it looks than the store-bought stuff?
I store it in a canning jar and crumble it when I use it. Keeping the leaves whole while in storage makes it taste better and last longer.
If you're harvesting in warmer weather, be careful not to get any Black Swallowtail Caterpillars. (It's worth it to plant parsley just to watch the caterpillars grow. If you plant it, they will come!)
Thursday, January 26, 2012
Who Needs Thomas'?
I was in Food Lion today to pick up a container of cottage cheese that I needed for lasagna. In my dash to the dairy case, I happened to notice they carried Barbara's Peanut Butter Puffins. My favorite cereal ever! Then I noticed the price. $5.69. FIVE DOLLARS AND SIXTY-NINE CENTS! Are you kidding me?
I quickly remembered why I gave up buying cereal. First, I'm too cheap. Second, unless it's organic, chances are that genetically modified corn is an ingredient. Even in Kashi, which was a surprise even though it probably shouldn't have been. Third, I know I can do better.
Tonight I made a huge batch of English Muffins (I've been making them for awhile but this is the first time I've had corn meal. Now they really look like the real thing.) Last week I made a batch of masa-waffles and froze them. Every morning, we toasted them straight out of the freezer and the girls ate with Papa's maple syrup. Sometimes it's homemade yogurt sweetened with homemade jelly with homemade granola. Or the homemade instant oatmeal mix with dehydrated fruit. On the weekends it's omelets with free-range eggs from the farmer down the road and peppers I froze from the garden. Occasionally, I'll make a batch of blueberry pancakes. Or french-toast to use up the 'bread ends' that end up in the freezer... homemade wheat bread toasted with homemade jelly... the list goes on.
The point is... we don't miss the cereal. And most of our breakfasts are just as quick in the morning.
Take that, Monsanto!
I quickly remembered why I gave up buying cereal. First, I'm too cheap. Second, unless it's organic, chances are that genetically modified corn is an ingredient. Even in Kashi, which was a surprise even though it probably shouldn't have been. Third, I know I can do better.
Tonight I made a huge batch of English Muffins (I've been making them for awhile but this is the first time I've had corn meal. Now they really look like the real thing.) Last week I made a batch of masa-waffles and froze them. Every morning, we toasted them straight out of the freezer and the girls ate with Papa's maple syrup. Sometimes it's homemade yogurt sweetened with homemade jelly with homemade granola. Or the homemade instant oatmeal mix with dehydrated fruit. On the weekends it's omelets with free-range eggs from the farmer down the road and peppers I froze from the garden. Occasionally, I'll make a batch of blueberry pancakes. Or french-toast to use up the 'bread ends' that end up in the freezer... homemade wheat bread toasted with homemade jelly... the list goes on.
The point is... we don't miss the cereal. And most of our breakfasts are just as quick in the morning.
Take that, Monsanto!
Wednesday, January 25, 2012
Homemade Vanilla Extract
One of the gifts I used this year for teachers and hostesses, etc. was homemade Vanilla Extract. It was super easy, and recipients have expressed A LOT of interest in how it's done. Last week, there was an article in the paper about making your own, which prompted even more questions.
So, I decided to post about it (I know, I know... just like every other blogger out there. It's a popular topic.)
First of all, get yourself a 1.75 L bottle of Vodka and a half pound of vanilla beans. (Do not buy these from a local store, you'll pay through the nose. Order online. I have used www.olivenation.com and have been happy. Best of all, they frequently have coupon codes and they always have free shipping on vanilla beans.)
I pour the Vodka into wide-mouth canning jars. You want to use at least 8 vanilla beans per cup of vodka.
Slice each bean the long way, and insert into the vodka.
Let sit for about 3 months and shake it when you think of it.
You'll see it getting darker and darker.
When it's done, you won't smell the Vodka.
For gift-giving, I purchased 4 oz amber bottles from HERE. I think I got 4 dozen and they were about a buck each after shipping.
I downloaded THIS free image and doctored it up using WORD.
The perfect, useful little gift.
So, I decided to post about it (I know, I know... just like every other blogger out there. It's a popular topic.)
First of all, get yourself a 1.75 L bottle of Vodka and a half pound of vanilla beans. (Do not buy these from a local store, you'll pay through the nose. Order online. I have used www.olivenation.com and have been happy. Best of all, they frequently have coupon codes and they always have free shipping on vanilla beans.)
I pour the Vodka into wide-mouth canning jars. You want to use at least 8 vanilla beans per cup of vodka.
Slice each bean the long way, and insert into the vodka.
Let sit for about 3 months and shake it when you think of it.
You'll see it getting darker and darker.
When it's done, you won't smell the Vodka.
For gift-giving, I purchased 4 oz amber bottles from HERE. I think I got 4 dozen and they were about a buck each after shipping.
I downloaded THIS free image and doctored it up using WORD.
The perfect, useful little gift.
Tuesday, January 24, 2012
Homemade Nutella
My kids love Nutella. Unfortunately, the first ingredient is sugar. And it contains palm oil, which is something I'd rather stay away from. So I set out on a quest to find the perfect recipe so I could make it myself.
The first challenge was finding the hazelnuts (also called filberts). Because it was during the holidays, some stores had them. And they were expensive, even if they weren't already shelled.
My lovely sister-in-law ordered me some from her co-op. (One of the things I REALLY miss about living here... there aren't any!) This is what 25 lbs of hazelnuts look like:
So, $160+ later, I had the nuts. And lots of them.
I scoured the interned for recipes. They were very similar, but we tried about half a dozen of them. They all called for cocoa, which I determined was the problem. Real Nutella is definitely milk-chocolaty, and those recipes were good, but more for an adult palette, not an 8 year old's.
I had a lot of homemade nutella at this point. To use it up, I made several batches of "Nutella Crinkles" that everyone loved. (I left out the chopped nuts because we don't like crunchy cookies.)
The quest for the perfect Nutella recipe was interrupted when my food processor died. I debated whether to spend mucho bucks on a Kitchen Aid or a Cuisinart, but settled on a $40 Hamilton Beach that got good reviews (and I can replace three or four times for the cost of the others.) It's larger and more powerful than my other, so I'm happy with the decision.
When I decided to resume the recipe search, I decided to pull out all the stops. The best recipe we'd tried so far used a can of sweetened condensed milk instead of sugar, and it made the smoothest spread. But it used cocoa, so it wasn't quite like the real thing.
I decided to make up my own recipe, using milk chocolate chips instead of the cocoa. It was the unanimous winner, and our search for a Nutella recipe is over. Here it is:
Toast 7 ounces of hazelnuts (which does NOT make a dent in the 25lbs!)
Remove as much of the skins as possible. You won't get them all, but do what you can.
Run them through a food processor for about 5 minutes, until they get liquidy (like the consistency of peanut butter.)
In a double-broiler, melt a package of milk chocolate chips. Stir in a container of sweetened condensed milk.
Add in the hazelnut spread and mix well.
Put it through another spin in the food processor if you want to really smooth things out. Drizzle in some canola oil if it needs it.
Voila! Kid-approved Nutella.
Now, I will not pretend to be happy that this recipe contains not only a whole package of chips, but also a whole can of sweetened condensed milk. But it's not as sweet as the original, so I know it has to have less sugar (which is, after all, the very FIRST ingredient in Nutella).
The first challenge was finding the hazelnuts (also called filberts). Because it was during the holidays, some stores had them. And they were expensive, even if they weren't already shelled.
My lovely sister-in-law ordered me some from her co-op. (One of the things I REALLY miss about living here... there aren't any!) This is what 25 lbs of hazelnuts look like:
So, $160+ later, I had the nuts. And lots of them.
I scoured the interned for recipes. They were very similar, but we tried about half a dozen of them. They all called for cocoa, which I determined was the problem. Real Nutella is definitely milk-chocolaty, and those recipes were good, but more for an adult palette, not an 8 year old's.
I had a lot of homemade nutella at this point. To use it up, I made several batches of "Nutella Crinkles" that everyone loved. (I left out the chopped nuts because we don't like crunchy cookies.)
The quest for the perfect Nutella recipe was interrupted when my food processor died. I debated whether to spend mucho bucks on a Kitchen Aid or a Cuisinart, but settled on a $40 Hamilton Beach that got good reviews (and I can replace three or four times for the cost of the others.) It's larger and more powerful than my other, so I'm happy with the decision.
When I decided to resume the recipe search, I decided to pull out all the stops. The best recipe we'd tried so far used a can of sweetened condensed milk instead of sugar, and it made the smoothest spread. But it used cocoa, so it wasn't quite like the real thing.
I decided to make up my own recipe, using milk chocolate chips instead of the cocoa. It was the unanimous winner, and our search for a Nutella recipe is over. Here it is:
Toast 7 ounces of hazelnuts (which does NOT make a dent in the 25lbs!)
Remove as much of the skins as possible. You won't get them all, but do what you can.
Run them through a food processor for about 5 minutes, until they get liquidy (like the consistency of peanut butter.)
In a double-broiler, melt a package of milk chocolate chips. Stir in a container of sweetened condensed milk.
Add in the hazelnut spread and mix well.
Put it through another spin in the food processor if you want to really smooth things out. Drizzle in some canola oil if it needs it.
Voila! Kid-approved Nutella.
Now, I will not pretend to be happy that this recipe contains not only a whole package of chips, but also a whole can of sweetened condensed milk. But it's not as sweet as the original, so I know it has to have less sugar (which is, after all, the very FIRST ingredient in Nutella).
Sunday, January 22, 2012
Kiwi Jam
The planets finally aligned and I actually had ripe kiwis AND time to make jam. This recipe is straight out of the Ball Blue Book... very easy.
Peel and chop 3 cups of kiwi (that was exactly 10 of mine, but depending on size 8-12 or so)
Combine with 1 cup of pineapple juice (no sugar added) and one box of pectin. (Some people add a few drops of green food coloring, but I say why bother?)
Bring to a boil, stirring often, and then add in 4 cups of sugar.
Return to a boil and let it go for one minute, stirring constantly.
Process in a BWB for 10 minutes and voila! Beautiful jam.
Peel and chop 3 cups of kiwi (that was exactly 10 of mine, but depending on size 8-12 or so)
Combine with 1 cup of pineapple juice (no sugar added) and one box of pectin. (Some people add a few drops of green food coloring, but I say why bother?)
Bring to a boil, stirring often, and then add in 4 cups of sugar.
Return to a boil and let it go for one minute, stirring constantly.
Process in a BWB for 10 minutes and voila! Beautiful jam.
Tuesday, January 17, 2012
A Walk Around the Homefront
It's 62 and sunny today... the perfect day to get the garden prepped for upcoming planting, right? Um, no. The wind is horrible! I did manage to get the equivalent of two rows hoed and covered. Come take a walk and see what else I've been up to!
All four rhubarb plants are coming up nicely. I had to put chicken wire around them because apparently our resident rabbit doesn't realize rhubarb leaves are poisonous.
I have corralled my 'garden ghetto' into one spot now that I'm getting the other beds ready for spring.
This is what the broccoli looks like inside it's happy little 'greenhouse'.
The cabbage is also starting to sprout.
The carrots have wintered well. They haven't grown much but I haven't covered them at all. I suspect now that we are closing in on 10 hours of daylight, they will start to grow again (I read somewhere that's the magic number.)
The parsley and cilantro are doing amazingly well, also. Again, haven't done a thing to them. Supposedly, our low for the year is 20 and they don't look any worse for the wear.
I have one last cabbage that is still growing, and every so often I can cut enough side shoots off the broccoli to serve with dinner. In another couple of weeks, though, I'll be tearing them out and getting this bed ready for spring.
Here you can see the garlic I planted in the fall, as well as the new trellising that was so easy to put up.
The only thing left in these beds are more carrots that aren't doing nearly as nice as the others. I can't for the life of me figure out why, but at least the harvest will be staggered.
The compost bins are waiting for warmer weather so they can get back to making black gold. We'll be planting milkweed for the monarchs on the right side of them.
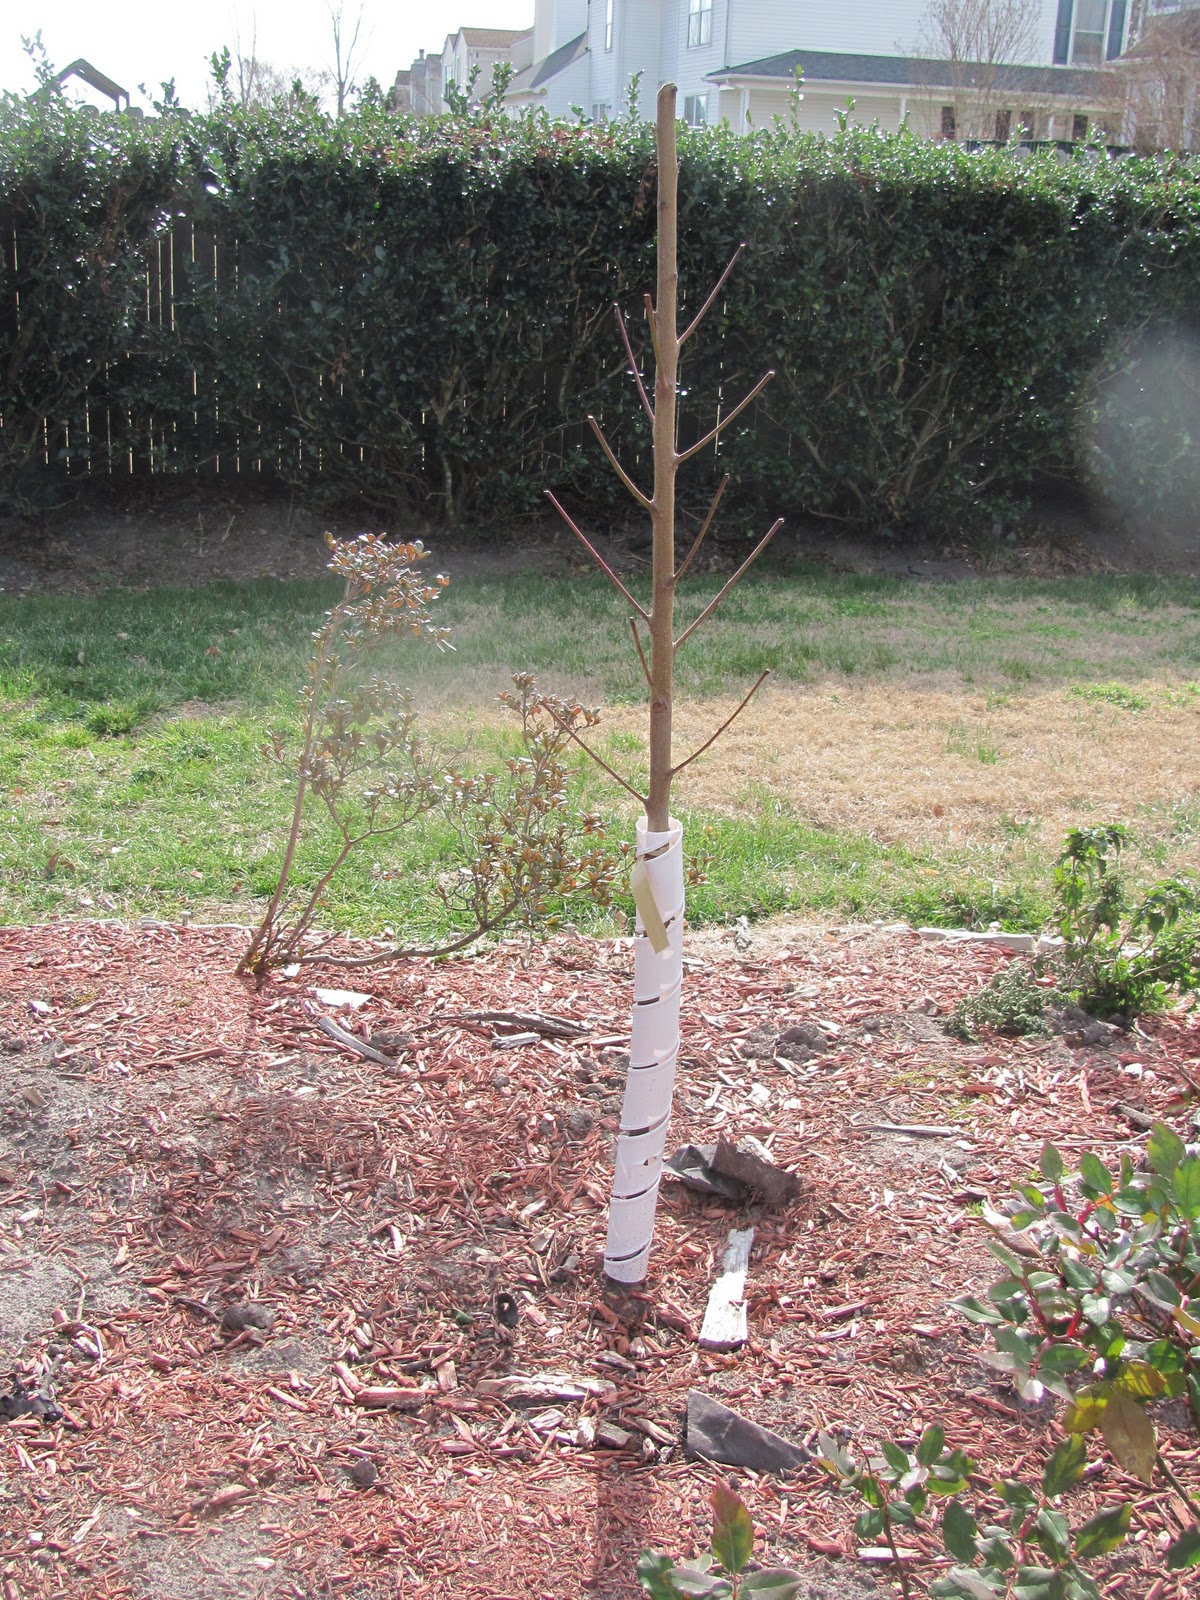
The new peach tree is still dormant, but I am so looking forward to watching it grow!
My clothesline has arrived, but since we're not permanently cementing it in the ground, I need to find an umbrella stand for it. And it's too tall, so Stephen will have to take the hacksaw to it!
The jalapeno inside is doing well. As you can see, many of the flowers are dropped and it's time for the peppers to start growing.
I rooted an assortment of herbs and they are faring fine.
The oregano plant I have is huge and probably past it's prime, so one of these plants will replace it. The others will be brought to an upcoming plant swap.
Someone tell these roses it's January. Every other bush has gone dormant!
These are the some of the daffodils and tulips I planted around the tree in our front yard. They've been peeking out for several weeks now, but I suspect the mild temps will hurry them along. I've been told the tulips won't come back (not enough chill time here) but we'll see. I'll enjoy them for the first year anyway. Apparently, daffodils do really well here so I'm looking forward to them.
That's it for now! Hopefully I'll have a lot of new sprouted seeds to show you in a few weeks!
All four rhubarb plants are coming up nicely. I had to put chicken wire around them because apparently our resident rabbit doesn't realize rhubarb leaves are poisonous.
I have corralled my 'garden ghetto' into one spot now that I'm getting the other beds ready for spring.
This is what the broccoli looks like inside it's happy little 'greenhouse'.
The cabbage is also starting to sprout.
The carrots have wintered well. They haven't grown much but I haven't covered them at all. I suspect now that we are closing in on 10 hours of daylight, they will start to grow again (I read somewhere that's the magic number.)
The parsley and cilantro are doing amazingly well, also. Again, haven't done a thing to them. Supposedly, our low for the year is 20 and they don't look any worse for the wear.
I have one last cabbage that is still growing, and every so often I can cut enough side shoots off the broccoli to serve with dinner. In another couple of weeks, though, I'll be tearing them out and getting this bed ready for spring.
Here you can see the garlic I planted in the fall, as well as the new trellising that was so easy to put up.
The only thing left in these beds are more carrots that aren't doing nearly as nice as the others. I can't for the life of me figure out why, but at least the harvest will be staggered.
The compost bins are waiting for warmer weather so they can get back to making black gold. We'll be planting milkweed for the monarchs on the right side of them.
The new peach tree is still dormant, but I am so looking forward to watching it grow!
My clothesline has arrived, but since we're not permanently cementing it in the ground, I need to find an umbrella stand for it. And it's too tall, so Stephen will have to take the hacksaw to it!
The jalapeno inside is doing well. As you can see, many of the flowers are dropped and it's time for the peppers to start growing.
I rooted an assortment of herbs and they are faring fine.
The oregano plant I have is huge and probably past it's prime, so one of these plants will replace it. The others will be brought to an upcoming plant swap.
Someone tell these roses it's January. Every other bush has gone dormant!
These are the some of the daffodils and tulips I planted around the tree in our front yard. They've been peeking out for several weeks now, but I suspect the mild temps will hurry them along. I've been told the tulips won't come back (not enough chill time here) but we'll see. I'll enjoy them for the first year anyway. Apparently, daffodils do really well here so I'm looking forward to them.
That's it for now! Hopefully I'll have a lot of new sprouted seeds to show you in a few weeks!
Subscribe to:
Posts (Atom)