Rosey the Riveter

Thursday, January 24, 2013

Larder Swap Preparations

Sunday is the long-anticipated Larder Swap with my Homesteading group.  It's a ton of fun, but it's also a bit of work.  Deciding what to bring to swap is the hard part.  Some people make items specifically for the swap, but I prefer to bring items that are already in my stash. 

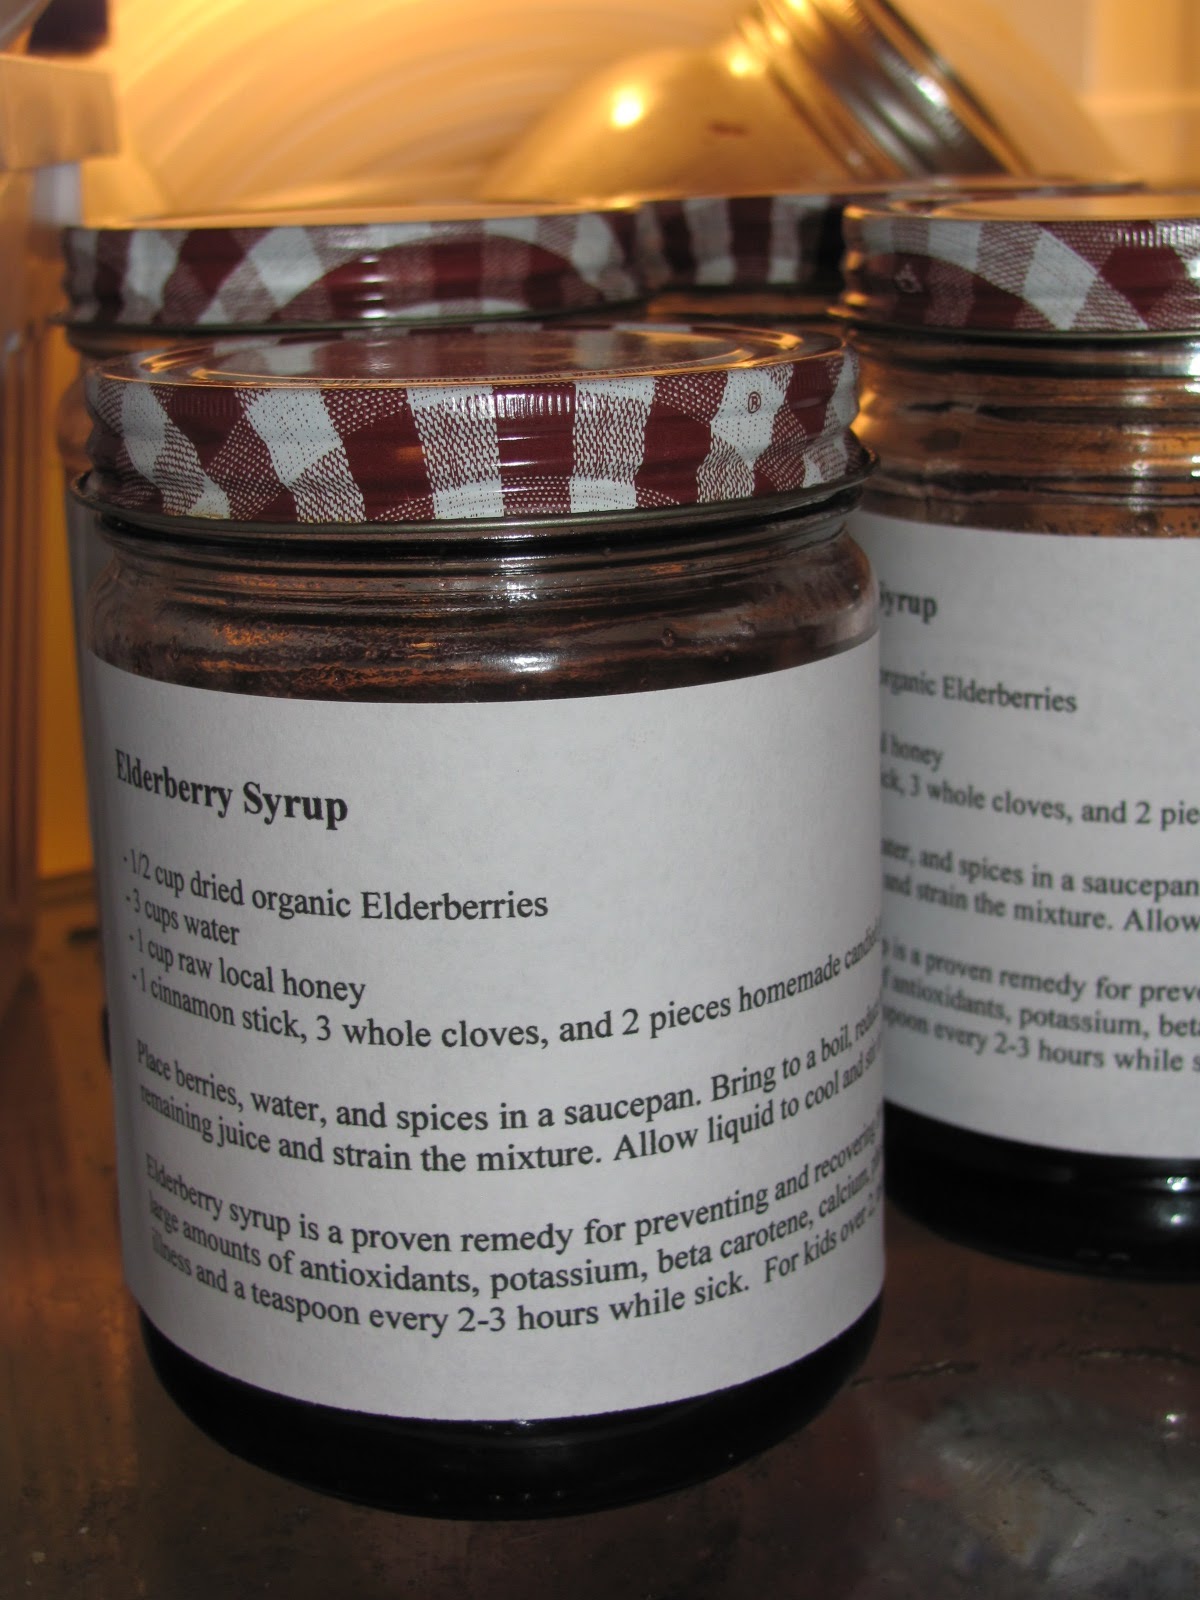
This time, I've decided upon Strawberry Peach Jam, Carrot Cake Jam, Creamsicle Jelly, and Chocolate Raspberry Sauce.  I'm also going to grind some Einkorn, which is an ancient wheat, and also bring a batch of Elderberry Syrup made with local honey.  My goal is to gather a decent mix of items that are also somewhat unique... everyone and their brother in this group makes their own laundry detergent, so that's an example of an item I wouldn't bother bringing.  Some people will bake bread, or bring eggs from their chickens, or homemade soap.  Anything goes, as long as it's homemade/home-grown/home-raised and edible or some sort of bath/body product.

Once I decide what to bring, it's time to label it, identify it, make it all pretty.

We will also bring a copy of the recipe.  This is a new requirement, but I think it's going to be helpful for those with dietary restrictions.  It will also help those of us who want to make sure that canned goods are processed according to current recommendations.

For each type of item we bring, there is a corresponding Swap Sheet.  This is where people will 'bid' on our items.  The first part of the Swap involves time to try samples, and bid on what we like.  The second half of the swap is the most chaotic... when we actually wheel and deal and find the people whose stuff we want and also want our own stuff!  The first time we did this, we had 40 people and it was hectic.  This swap will probably be around 30, which I think is actually a better number.

I can't wait to see what I come home with!


Monday, January 14, 2013

Blessed Bee!

It's been in the 60s for several days this year.  Unfortunately, they've either been rainy or I've had plans... so we couldn't get into the bees.  Finally, today, the stars aligned and we finally got to have a peek for the first time since... well, I forget.  November?  At that time, we weren't sure they had enough honey stored for winter, so we've been feeding them off and on with heavy sugar syrup.

The hives are 1/4 mile down the road at my neighbors house, so I don't get to see them out and about on those nice days.  So when I arrived this afternoon and saw them flying around and in and out of the hive, I was thrilled.  They were all loaded up with pollen!
Normally, there's not such a back-up at the entrance, but during the winter we reduced the size to make the hive easier for the bees to defend.

We were absolutely thrilled to see that we had eggs.  Although we didn't see them, it confirms that both queens are alive and well.  If you click on the picture above, you'll be able to see the tiny eggs in each of the cells.

This picture doesn't do it justice, but I just gasped when we pulled this frame out.  It was absolutely gorgeous.  What you're looking at is all different kinds of pollen, which will be used to feed the brood.  I encourage you to click on this picture and get a better view.

I came home absolutely thrilled... like a mother who got to see her kids after a long separation, relieved to see that they were doing well.

Right about now, I am feeling incredibly grateful and blessed that we got into our hives and found them thriving.  Tonight at our monthly Beekeeper's Guild Meeting, members were abuzz about the number of hives lost.  Many beekeepers have lost multiply hives so far this winter.  The bees just disappeared, leaving behind frames full of honey.  One lost 4 out of 10 of his hives.

Someday it will be us.  Beekeeping is like farming, and some years are better than others.  There will be mites and beetles and Nosema Virus, and probably CCD (Colony Collapse Disorder).  It is impossible to avoid.  But I am grateful that so far, our girls are okay.  They've got plenty of food-stores to get them through the rest of the winter, even if it gets colder (or, should I say, ESPECIALLY if it gets colder.  They actually eat more in warmer weather because they are out flying and not huddling in the hive.)  And we have eggs!  That makes it a heck of a lot easier for them to raise a new queen if something were to happen.  Fingers crossed for the rest of the winter... February can be brutal.


Monday, December 31, 2012

Homesteading Goals for 2013

I don't like resolutions.  Mostly, because I'm not good at keeping them.

I am much better at goals, so here goes:

1.  Chickens!  One of the reasons I was so bad about updating the blog this fall was that I was busy helping the group "4 Chesapeake Hens" to legalize chickens.  It involved lots of research, calling planning commission members and City Council members, and attending some meetings.  In the end, we got exactly what we wanted... up to 6 hens and NO 6' privacy fence requirement, which is what Planning proposed, along with only 4 hens.  I have ordered the plans for the tractor that I want to keep them in, and Stephen is heading to Home Depot tomorrow to buy what he needs to begin building.  We are very excited about this new endeavor!

2.  Food Preservation:  I'd like to rely less on the freezer, which will mean more canning and dehydrating.  Thanks to last years records, I feel like I have a better idea of what the family will need/use so I won't be flying by the seat of my pants.  I am in the middle of my 2013 Can Plan, and once that's in place, I'll be in good shape.

3.  The Garden:  There will be changes in 2013.  No broccoli or cabbage, for one thing.  The Cabbage Moths here are awful, and I know that I can buy them from a local farmer for $1/head.  It's not worth taking up space in the garden for that.  There will be more carrots and lettuce.  More medicinal herbs.  More Calendula.  No tomatoes (again, I know I can buy them cheap and they take up so much room!)

4.  Meal Planning:  With two FULL freezers, I need to be better about planning meals and using what we have on hand.  Also, it's less stressful in the afternoon when I know what's for dinner.  My grocery shopping has changed dramatically over the past year, and it's so nice to know that I don't have to make huge weekly stock-up trips.  Instead, I need to make a quick trip in for olive oil, or butter, or toilet paper.  We have chicken and beef in the freezer, fruits and veggies either canned or frozen, and I get our eggs and our milk in glass bottles from a local farmer.  I try to make our bread with fresh ground flour... and I've gotta tell you, I don't miss the supermarkets.

5.  Learn something new.  In 2012, I attempted knitting (which is not for me), crocheting (much easier!) making mozzarella, grinding my own flour, pressure canning meat, and, of course, beekeeping.  In 2013, it's going to be all about chicken keeping!  I'd also like to do more with homemade cheeses.  I've signed up for a queen-rearing class and hopefully we'll be harvesting our own honey.

I think those are enough goals for now.  I'm sure they'll change over the course of the year, but for now, it's a good place to start.

Happy New Year, my friends!

Friday, December 28, 2012

The Great Can Plan of 2013

I have a bunch of kiwi in the fridge, freshly picked from a local orchard in Knotts Island.  That can mean only one thing... my 'break' from canning is over.  I've done a few things here and there since the last of the apple butter and mincemeat in October... mostly chicken as I've found the antibiotic-free stuff on clearance (and no freezer space to store it), but I gave a TON of canned goodness away as Christmas gifts, so my shelves are not as full as they used to be.

However, kiwi jam is the family favorite, so it's time to get going again.  And one of the things that I wanted to get done before starting up is my 2013 Can Plan.  I first made a plan last year, which I knew would be my largest canning endeavor ever (thanks to an amazing location with lots of local fruits and veggies).  It really helped me focus, and helped me to not be overwhelmed, when I was drowning in strawberries and cukes and everything else.

Basically, a Can Plan is a road map... for jams and jellies and pickles, I make a list of recipes I want to make in the upcoming season, organized by fruit/veggie.  When I have free time, I will photocopy those recipes and organize them in sheet protectors in a large 3-ring notebook.  I will sort them by season.  (For example, kiwis first, then strawberries, then peaches, etc. according to the order they ripen here in Hampton Roads).  For corn and greenbeans and other veggies that get canned straight-up, I will simply list how many pints/quarts I need to put up of each, and I will also estimate how many pounds of produce it will take to do so.  Last year, I kept a running list of the recipes I'd made and how many jars they made.  I also attempted to list how much produce I bought.  This will help in my 2013 estimations.  (For example, since we're about out of dehydrated peaches, I know that I need to buy more than I did last year.  Since we still have plenty of salsa, I probably won't need to make as much as I did in 2012.)

 This is a photo of the running list I kept.  It was taped to the inside of my cabinet door, so every time I canned something, I listed how much of it resulted.

This is a page out of my 2012 Canning Binder.  As you can see, I made notes about how many quarts it actually made, and also that it tasted amazing...  very helpful when determining which recipes to keep for 2013 and which to forgo.
And this is what the beginning of the new Can Plan looks like.  First, I looked through all my books for Kiwi recipes... then I went through and looked for cranberry recipes (since I have a ton in the fridge right now!).  I will do the same thing for all of the fruits I can get locally... so that when they are in season, I know exactly what recipes to make and also exactly what ingredients I'll need to have on hand to make them!  It also helps to make sure you have enough jars!  Of course, not pictured, is my Canning Board from Pinterest which also holds valuable information!  I'll print out those recipes I want to try and include them in my binder.
If you click on this photo, you can see my notes so far.  Like I said earlier, I'll photocopy each of these recipes and put them in my binder, and I will be all set for the great produce deluge of 2013.  It does take time, but it's so worth it in the end!

2012 in Review


This information will be coming in handy as I plan for next year (more on that later.)  I've marked with asterisks our favorites, which will be first priority in 2013.

January

Kiwi Jam: 5 jelly jars  ***
Kiwi Preserves: 3 jelly jars
Cider-Cranberry Jelly: 7 jelly jars
Kiwi Daiquiri Jam: 5 jelly jars 

March

Pear Ginger Jam: 5 jelly jars
Cinnamon Pear Jam: 8 jelly jars 
Wild Violet Jelly: 4 jelly jars
April

Strawberry Kiwi Jam: 6 jelly jars  ***
Strawberry Vanilla Jam: 4 jelly jars ***
Strawberry Lemonade Concentrate: 7-12oz jars
Strawberry Rhubarb Jam: 8 jelly jars ***
Black Beans: 7 quarts
May

Strawberry Jalapeno Jam: 9 jelly jars
Strawberry Lemon Marmalade: 8 jelly jars
Strawberry Anise Hyssop Jam: 6.5 jelly jars ***
Strawberry Orange Jam: 8 jelly jars
June

Strawberry Anise Hyssop: 3 jelly jars
Peach Jalapeno: 4 jelly jars
Pineapple Coconut Jalapeno: 5 jelly jars  ***
Caramel Apple Jam: 6 jelly jars  ***

July

Cherry Lemon Verbena Jam: 4.5 jelly jars
Peaches: 4 quarts
Sweet Pickle Relish: 6 pts  ***
Cherry Peach Vanilla Jam: 3.5 jelly jars  ***
Peach Strawberry Cinnamon Jam: 5 jelly jars  ***
Blueberry Cinnamon: 4 jelly jars
Cherry Marmalade: 4 jelly jars
Corn: 3 pints
Corn Cob Jelly: 6 jelly jars
Peaches: 7 quarts
Cherry Vanilla Cardamom Jam: 4.5 jelly jars
Corn Cob Jelly: 6 jelly jars
Peach Jelly: 9 jelly jars
Spiced Blackberry Jam  ***

August

9 pts salsa  ***
7 pts bbq sauce
7 pts rotel  ***
3 jelly jars spiced grape jam
7 jj Peach Coconut Rum Sauce  ***
5 jj Ginger Peach Jam
13 jj Strawberry Peach Jam
6 jj Peach Jelly
6 jj caramel apple jam  ***
5 jj fig jam
9 jj mango jam
13pints hot salsa
14 qts grape juice  ***
5 jj strawberry watermelon jam
4 pts beef stock
15 pts pear sauce
9 pts B&B pickles  ***
7 qts Mrs. Wages Dill pickles  ***
6 qts Apple Pie Filling   ***
9 pts apple sauce
5 jj cantaloupe vanilla jam
5 jj peach salsa
7 pts rotel
6 qts Peach Pie Filling ***

September

4 jj concord grape jelly
5 qts mincemeat
17 qts applesauce
4 jj apple butter
5 jj watermelon jelly
7 pts wm marachino jelly

October

5 jj Carrot Cake Jam
5 pts Rum Raisin Pear Butter
5 jj Carrot Cake Jam w/o coconut
9 pts spiced apples
7 qts apple pie filling
lots of T.O.E. jam (Tangerine, Orange, Elderberry)
6 jj apple butter
5 qts mincemeat
9 jj whiskey raisin apple butter

December

32 pints chicken
 

Sunday, December 16, 2012

Handmade Ornament Swap

Last year, a member of my homesteading group hosted a handmade ornament swap.  I had such a fun time that as soon as it was over, I was already thinking about what to do for THIS Christmas.  I wanted to make something that represented some aspect of homesteading... so when I saw repurposed canning lids painted as snowmen, I knew that's what it was going to be.
 This is a pink one that I made especially for Abby, because it's her favorite color.
These are all the ones I made for the swap.
 My friend Kylene made the felt chickens.
 And Valerie got some Oyster Shells from a local restaurant and painted them up!

There were many more creative ideas, and I love that every year as I hang them on our tree, I will be reminded of a great group of people who have taught me so much!


Tuesday, December 11, 2012

100% Whole Wheat Bread

It's been way too long since I've posted.  I've been trying to prepare for Christmas and I finally learned how to crochet correctly, so instead of being on the computer at night, I usually have yarn in my hands.

One of the things I've been experimenting with lately is milling my own flour from wheat berries.  Two summers ago, I was VERY lucky to find a Nutrimill at a thrift store for $7.  Truthfully, I didn't even know for sure at the time that it was a grinder, but knowing how expensive they were, I was willing to take the chance.  And I'm glad I did!  They are $259 new!

Unfortunately, most of the recipes for wheat bread call for half white flour, and I didn't want to have to use it.  So I decided to buy the book "No More Bricks" by Lori Viets, which is a great one for beginner grinders like me.  There are only like 4 basic recipes in the book, but it teaches you all sorts of ways to use them, along with discussing the different types of grinders and grains.  I have been extremely happy with the bread I've been baking, and even happier that there is no white flour in the loaves.

On a recent trip to the local Amish Bulk Store (it's kind of new, and I was thrilled to discover it!) I bought a package of 7 grain berries, excited about the possibility of turning it into bread.  Normally, I don't pay that much for wheat berries, but normally, I buy in 25 or 50 lbs quantities!
 This is what the Nutrimill looks like, with a pound of berries ready to go.
 And this is the flour that results.  It's just beautiful!
 The recipe for the bread can be found HERE.  (I tripled it) But these are the ingredients:
My apologies to those who are unable to tolerate gluten.  In my experience, it's a needed addition in order to get a great loaf of 100% Whole Wheat.  After dumping the ingredients into my mixer and kneading it, I just shaped the loaves and let them rise in the oven with the light on.
After an hour or so, when the dough is an inch above the pan, bake for about 30 minutes at 350.
 Delicious, healthy whole wheat bread!